FAQ | WWW Starting Points | HTML Resources | ISTE Standards
One of the most interesting and satisfying parts of this course is helping people create and post their own personal web page. Making a simple web page is not as difficult as you might think, and while a "power user" might say I've made it too easy--why not? Let's look at the easy way of making a web page. Once you get the hang of it you can branch out and try some more complex things. If you follow these steps, you can have a web site put together at one sitting (2-3 hours at the most).
Links to additional resources to assist you in developing and refining your web pages are available on the Web Page Construction (HTML) Resources web page which is part of this web site.
What to Do Before You Compose Your PageAs with any creative effort, the most
important thing is having an idea of what you want to do. The most
powerful word processor doesn't write great prose all by itself!
Somebody (like you!) has to have a good idea about which you want to
write. Well, the same holds true for web pages, so don't just jump into
making a page--get out a piece of scratch paper and hand draw some ideas
of what you want on your site. A template
has been created to assist with this effort.
Basically the items you'll want to place on your site fall into three categories:
Text: In this lesson we're going to use a recent version of NVu (pronounced "new-view") to create our web pages. Get Nvu here. For text entry and editing, NVu works pretty much like any word processor--copy, paste, spell check, etc. are all available. Of course as with any writing, grammar and mechanics count. A typo on the web has the potential to embarrass you all the way across the world, so write well! (Another tool, nearly identical to NVu, but packaged with a suite of other tools such as a web-browser, e-mail and newsgroup client, IRC chat client, and HTML editing is called SeaMonkey. Download SeaMonkey here.)
Graphics: Web graphics come in three standard formats: JPEG, GIF, and PNG. PNG (Portable Network Graphics) is an emerging standard which isn't very widespread, so we can ignore it. The two formats about which you should know are JPEG (which stands for Joint Photographic Expert Group) and GIF (Graphics Interchange Format). These are two different set of rules for how web graphics files will be saved and displayed. Both will work just fine on your web page, so what's the difference?
GIFs tend to be a bit smaller, but their quality and complexity is limited. GIFs may be animated--many of the moving graphics you see on web sites (and all of the animations you see on the EDC 220 site) are animated GIFs. JPEGs tend to be higher quality, but their file size can get hefty, which can slow down your page. In general, when you are using simple graphics for illustration and navigation purposes--things such as arrows, lines, backgrounds, etc., use GIFs. When displaying a full-color photograph, use JPEGs.
There are two major ways to get graphics for your web site. You can create your own web graphics using a scanner and standard graphics software or you can "harvest" graphics from other web sites. There are many web sites set up specifically to display and distribute copywrite-free graphics for you to copy and use. One of the easiest to navigate is the Microsoft Clip Art Gallery. Another easy-to-use site is Hassle-Free Clip Art. These sites have an enormous amount of web-ready graphics for you to use on your web page: buttons, bullets, backgrounds, animated GIFs and more! Harvest whatever you need and use them on your pages.
Links: To what other web sites do you want to link? Maybe you'll want to link to your favorite sports team's web site, or your school, or whatever. Anyplace to which you can go with your web browser is "linkable" to your web site. Make a list of your links and have them available when you compose your page.
Very Important Step: Before you create your web page(s), you should make a home folder or directory for your web site. (This is especially helpful on Windows computers due to certain technical issues you may encounter with setting up NetStorage. If you have live access to your AugNet storage space on a Mac, this step may be skipped.) This folder will be a storage space in which all of the items for your web site (pictures, HTML text, etc.) will reside. It is very important that you create this folder first or your hyperlinks and graphics may not work correctly when you post your site to the web.
First, create a folder, then name this folder the same as your AugNet user ID from your Personal Web Page Agreement. Usually this is your last name. For example, if your name is John Smith, then your user ID will probably be "smith." Then you should create a folder called "smith." Let's call this folder your "base" folder. Place this folder on the Desktop of your computer.
Copy all the preselected items you want to place on your web site in your "base" folder, for example, pictures you have scanned, cool graphics you have harvested, and other items you want to place on your site. They must not be scattered all over your hard drive. Move all of the items you want to place on your web page to your "base" folder. Any subsequent items you want to place on your web page must also be moved into this folder before you actually place them on your site. This is very important!
Another important issue: to ensure compatibility of your files, you should follow these rules when naming files (and folders) for your web site:
Once you have created the base folder and placed your files in the folder, you are ready to start NVu or SeaMonkey and begin composing your web page. NVu is available on most Augsburg campus machines--Mac or Wintel. If you have NVu or SeaMonkey on your home computer, you may also compose your web page(s) there. Get Nvu here. Download SeaMonkey here.
Creating Your Page
The NVu interface is similar to a word processor, so you probably can learn it quickly. When you're finished, it saves your pages as Hypertext Markup Language (HTML) files. HTML files use the special formatting codes that are interpreted by Web browsers to display information on a wide variety of computer types. So, no matter what type of computer you have, every Web surfer with a modern browser will be able to see your pages.
Platform
It is important to note that the same Web page may look
different depending on the browser being used to view the
page.
To use the NVu, first start Nvu.
NVu looks similar to Netscape or Mozilla browser, but it works in
reverse--you can create your own Web pages in it, instead of viewing
pages created by other people. Most people find it very easy to use. The
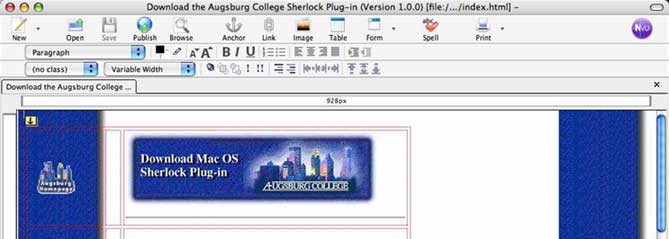
sample shown below (see Figure 1) was created in NVu.
The key to creating Web pages without knowing HTML, is to use the two
toolbars. NVu inserts two types of formatting codes: those that you can
see on the page and hidden HTML codes. Let's look at the formatting
toolbar (see Figure 2):

Inserting and Formatting Text
The best way to show you how these buttons work is to give you a hands-on exercise. If you haven't already opened NVu, start NVu. We'll begin by entering some plain text, and then we'll modify it with the toolbar.
Try creating some sample text on your new web page by using these steps:
Getting started is pretty easy, isn't it? Of course you can spend hours playing with different fonts, colors, headings and alignment options, so get creative and have some fun.
Many of the other buttons on this bar--such
as New, Open, Save, Spell, and Print--don't warrant a
separate explanation because they're typical of other applications. But
some of them have no parallel in word processing, so we'll give you an
overview of their functions below:
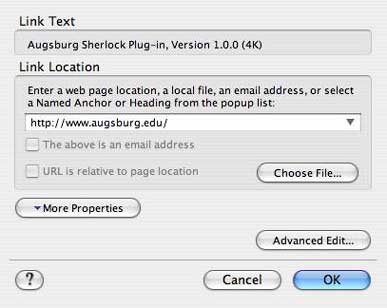
Creating a Hyperlink
Now we'll give you some more exercises that will illustrate how to use some of these HTML buttons. Then preview your page in your web browser so you can see exactly how it will look on the Web.
First, we'll create a link on this page, so we assume you're at the spot where we left off above.

Now you're ready to test your page.
Working with Tables
Tables are one of the most powerful layout control devices in use on the Web. Right now, for example, tables are the only way that you can display two blocks of text side-by-side on a Web page.
You have seen many more tables than you realize, too. That's because many Web authors use tables for precise layout control, but turn off the table border so you don't know that a table is on the page.
But, for all the layout value they deliver,
writing tables in HTML from scratch is a challenging and frustrating
experience. Web authors have long wished for a simple, quick tool to
create tables. Fortunately, you have NVu that includes a user-friendly
table creation tool. You only have to select the options you want from
an easy-to-use dialog box, and then NVu will generate the intricate HTML
codes and place them in your page. Here's how:
Formatting
Your Table
Once you've entered text into the cells of your table, you
can go back and format it with the formatting toolbar. Just
select anything you want to format and click the attributes
you want, such as bold, italics, size or a color. All of
those complex HTML codes are simply inserted for you. Other
table-related formatting options are also available under
the Table menu. More precise
table formatting may be accessed by selecting the table
and choosing "Table Properties..." from the Table menu.
Okay, this could go on and on. In fact, there are dozens of thick books on creating Web pages, but at least you've got the basics. Of course you won't need a stack of HTML books because you have the NVu! Let's wrap-up it for now.
Extra! Extra!
Cool isn't it! And just think, you've created HTML codes.
Would you like to see them? Okay. Click the View menu,
then HTML Source and you'll see the codes that
make a page work. How would you like to type all of that
manually?! When you're done, click the Close button.
Once you upload your page to the Web, you can admire your
handiwork by viewing the HTML codes created using NVu.